How to Ship HVAC Equipment by LTL Freight
Prepare HVAC equipment for LTL using model-specific handling, refrigerant checks, protective packaging, finished measurements, and verified site requirements.
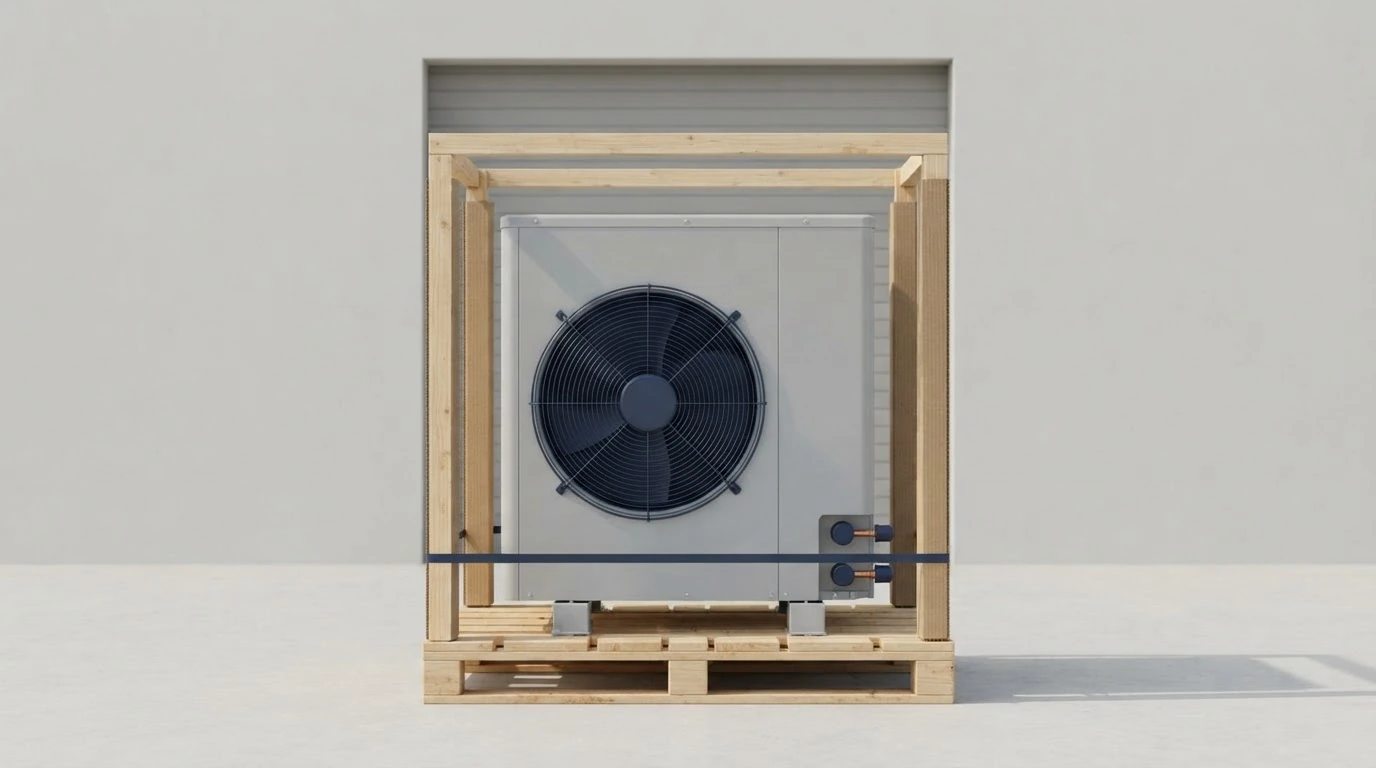
To ship HVAC equipment by LTL freight, identify the exact model and condition, determine its refrigerant and regulatory status, follow the manufacturer’s handling and orientation instructions, build or preserve a stable forkliftable package, protect vulnerable panels and connections, measure and weigh the finished unit, confirm the current classification, and disclose the real pickup and delivery requirements.
LTL can fit equipment that can move safely through the selected carrier’s shared handling environment without a dedicated trailer. It is not automatically right for every condenser, furnace, air handler, heat pump, coil, rooftop unit, or chiller. Finished size, weight, center of gravity, packaging, lifting method, refrigerant status, service needs, and carrier acceptance determine the practical option.
Step 1: Identify the equipment before choosing a mode
Start with the model and the shipment as it will leave the facility:
- equipment type, manufacturer, model, and serial or order reference;
- new factory-packed, new unpacked, used, damaged, returned, or scrap condition;
- complete unit, separated sections, replacement coil, compressor, blower assembly, line set, or accessory;
- whether refrigerant, oil, a battery, pressurized component, or another regulated material is present;
- factory shipping base, skid, frame, lifting lugs, fork pockets, and approved rigging points;
- required upright, horizontal, or other handling orientation;
- center-of-gravity information and any off-center load warning;
- packaged dimensions and gross weight for each handling unit; and
- installation-site and receiver requirements.
Do not infer handling instructions from appearance. Two outdoor cabinets can have different compressor layouts, bases, lifting provisions, and orientation limits. Obtain the current manual or written manufacturer instructions for the exact model.
If the unit is unusually large, long, tall, top-heavy, non-stackable, difficult to enclose, or dependent on a crane or specialized trailer, compare LTL with a realistic alternative before tender. There is no universal HVAC-unit threshold that settles that decision.
Step 2: Check refrigerant and regulated-material status
Determine whether the equipment is factory charged, field charged, empty, recovered, used, damaged, leaking, or being shipped for disposal. Record the refrigerant type and charge information available from the nameplate and manufacturer documentation.
EPA’s current Section 608 guidance prohibits intentional venting of covered refrigerants and substitutes during maintenance, service, repair, or disposal and establishes refrigerant-management requirements (EPA: Managing Refrigeration and A/C Equipment). Do not release refrigerant simply to prepare equipment for transportation.
Shipping a charged appliance, a refrigerant cylinder, and a used leaking unit are not the same regulatory situation. Before tender:
- Determine the actual contents and condition.
- Identify the federal, state, and local requirements that apply.
- Use a properly certified technician when service or recovery requires one.
- Complete any required hazardous-material classification, packaging, marks, labels, documents, and training.
- Confirm that the selected carrier and service accept the equipment as prepared.
Do not assume that factory-charged equipment is automatically prohibited or that an empty-looking unit is automatically unrestricted. Use qualified refrigerant and hazardous-material reviewers when the answer is uncertain.
Step 3: Follow the exact model’s handling instructions
Manufacturer manuals illustrate why HVAC handling cannot be reduced to one rule. A current Daikin installation manual for specified outdoor units instructs handlers to keep those units upright, retain them on the pallet for forklift transport, use defined sling arrangements, protect the cabinet from belt damage, and account for an offset center of gravity (Daikin: Installation Manual). Those directions apply to the identified models, not every HVAC product.
A Trane air-handler manual describes separate shipped sections, integral base frames, model-dependent lift points, shipping skids for certain sizes, and inspection of components at receipt (Trane: Air Handler Installation, Operation, and Maintenance). Again, use the manual for the actual unit.
Before moving or packing the equipment, confirm:
- approved fork-entry locations and minimum fork requirements;
- approved lifting lugs, sling points, spreader bars, and protective blocks;
- center of gravity and lifting balance;
- whether factory braces or shipping bolts must remain installed;
- orientation and tilt limits;
- which panels, coils, drain pans, valves, and connections cannot bear load; and
- when factory packaging should remain in place.
Never attach freight restraints to refrigerant tubing, coil guards, sheet-metal panels, fan grilles, service valves, controls, or other points that were not designed for securement.
Step 4: Package for the equipment type
FedEx’s current freight-packing guidance distinguishes pallets, crates, blocking, bracing, banding, stretch wrap, and outer protection as tools with different purposes (FedEx: Freight Packing and Packaging Guidelines). Use that as carrier-specific guidance and confirm the requirements for the service actually being considered.
A qualified packaging or rigging reviewer should assess a new design, high-value unit, fragile coil, top-heavy cabinet, used appliance, or repeat production shipment before release.
Outdoor condensers and heat pumps
Preserve suitable factory packaging when possible. Support the unit through its approved base, keep it within the skid footprint, and restrain the base or frame without crushing the cabinet. Protect coil faces, fins, service valves, capped connections, fan guards, and lower panels from fork contact and neighboring freight.
If an outer crate or frame is added, leave clearance so it cannot rub the coil or transmit banding pressure into the sheet metal. Follow the model’s orientation and tilt requirements; a generic “this side up” mark is not a substitute for physical stability and proper handling.
Furnaces, fan coils, and compact air handlers
Protect cabinet corners, access doors, drain pans, electrical compartments, flanges, and protruding fittings. Use a base that supports the entire factory frame and prevents pallet overhang. Immobilize loose factory-supplied accessories or ship them in separately identified packages when the manufacturer permits.
Do not place concentrated top loads on panels that were not designed to carry freight. If the completed unit cannot safely support stacking, disclose it during quoting and use a package that protects it rather than relying only on a non-stack label.
Sectional air handlers and packaged commercial units
Treat each shipped section as a controlled handling unit. Preserve section order, orientation, tags, loose components, and connection protection. Use the manufacturer-designated frame and lift points, account for center of gravity, and prevent sections from contacting one another.
Large rooftop or packaged equipment may require a crane, spreader arrangement, specialized trailer, or site-specific unloading plan. Do not force a shipment into LTL because it happens to sit on a skid.
Replacement coils and heat exchangers
Use a rigid frame or crate that protects fins, headers, tubes, connections, and drain fittings without making them load-bearing. Immobilize the assembly with supports positioned at structurally approved areas. Keep fasteners, caps, and small accessories contained and traceable.
Compressors and dense service components
Use a base designed for concentrated weight and secure the component through approved mounting feet or a purpose-built cradle. Protect terminals, ports, tubing stubs, and machined surfaces. Determine oil and refrigerant status before packing, then use appropriate caps, containment, and documentation.
Long line sets, duct sections, and irregular accessories
Use a purpose-built skid, tube, rack, or crate that supports the full length and protects ends and fittings. Prevent rolling, bowing, abrasion, and end-to-end movement. Include every projection and protective frame member in the finished dimensions.
Step 5: Measure and classify the finished handling unit
NMFTA explains that the current National Motor Freight Classification evaluates commodities through density, handling, stowability, and liability (NMFTA: National Motor Freight Classification). Density matters for many items, but it is not a universal HVAC class calculator.
Measure the extreme length, width, and height of the complete package, including the skid, crate, overhang, corner guards, projections, and any non-stack device. Weigh the complete handling unit, not the catalog product before packaging.
Then:
- Identify the actual commodity as prepared and the current applicable NMFC item.
- Apply the item’s packaging and density provisions.
- Check for handling, stowability, liability, or carrier-tariff provisions.
- Record the dimensions, weight, item, class, and source of the determination.
Do not use a generic class range for condensers, furnaces, or air handlers. A bare replacement coil, factory-packed outdoor unit, crated compressor, and sectional air handler can have different classification and packaging facts. Recheck the data if the unit, accessories, skid, crate, or stackability changes.
Step 6: Confirm the facilities and requested services
The origin might be a factory or distributor with a dock, while the destination could be a contractor shop, residence, school, roof-access project, construction site, mechanical room, or appointment-controlled facility. Describe what the carrier must actually do.
Confirm:
- whether a suitable dock, forklift, or crane is available;
- whether a liftgate is requested and can accommodate the package;
- whether the carrier must move freight beyond its standard pickup or delivery point;
- whether the carrier classifies the site as residential or limited access;
- appointment, notification, security, and business-hour requirements;
- vehicle access, surface, grade, overhead-clearance, and unloading constraints;
- whether a qualified installer or rigging crew must be present; and
- whether the carrier requires prior approval or specialized equipment.
Liftgate capacity, platform size, site definition, appointment procedure, service name, limit, and charge are carrier-specific. A heavy or tall unit that is under a stated weight limit may still be unsuitable for a particular liftgate because of footprint, balance, or unloading conditions. Confirm the complete package, not just its weight.
Step 7: Keep the tender consistent with the quote
Carry the same facts into the accepted quote, bill of lading, labels, and pickup:
- equipment and model description;
- new, used, returned, or scrap condition when relevant;
- handling-unit count and package type;
- extreme packaged dimensions and gross weight per unit;
- NMFC item and freight class when applicable;
- regulated-material information and documentation when required;
- manufacturer-required orientation and approved handling points;
- truthful stackability and special-care requirements;
- origin, destination, dates, contacts, and requested services; and
- accepted pricing or service reference.
Before pickup, inspect the base, crate, restraints, braces, cabinet, fins, tubing, connections, caps, labels, and documents. Look for leaks, loose accessories, missing shipping bolts, unstable weight, crushed packaging, exposed components, blocked fork pockets, and conflicting old labels. Photograph the complete prepared unit from useful angles.
If the quote covered a new factory-packed upright unit, do not tender an unpacked used unit on a replacement pallet under the same data. Request new instructions and pricing when the shipment changes.
Step 8: Inspect at receipt and preserve evidence
Give the receiver the equipment identifiers, expected handling units, accessories, and inspection process. At delivery, compare visible count and condition before signing. Check the outer package, base, cabinet, coil faces, fins, service connections, controls, and any tilt or impact indicators supplied with the product.
Record specific visible exceptions on the delivery receipt when appropriate, photograph the condition, preserve the package and unit, and follow the governing notice and claim procedures. Do not issue a blanket instruction to accept or refuse all damaged freight; contracts, carrier rules, replacement urgency, safety, and the nature of damage can affect the appropriate response.
No photograph, notation, package design, orientation label, or declared value guarantees a claim outcome. The tariff, contract, evidence, packaging adequacy, liability rules, timing, and facts of the event can matter.
For repeat shipments, track exception reasons such as bent panel, crushed coil guard, damaged fins, loose restraint, leaking unit, missing accessory, reweigh, dimension correction, classification change, liftgate mismatch, or missed appointment. Review patterns by model, supplier, pack design, warehouse, lane, carrier, and receiver.
HVAC LTL quote checklist
- Exact equipment type, manufacturer, model, and condition
- Refrigerant and regulated-material status
- Manufacturer handling, orientation, and lifting instructions
- Origin and destination postal codes and facility types
- Completed handling-unit count, dimensions, and gross weights
- Current NMFC item and freight class when applicable
- Stable manufacturer-approved base, skid, crate, frame, restraint, and protection
- Truthful stackability and special-care requirements
- Pickup date, receiver hours, and unloading plan
- Liftgate, inside, limited-access, residential, appointment, notification, or other requested services
- Consistent quote, bill of lading, labels, and tendered equipment
- Origin and delivery condition evidence
Shipocity is backed by a team with more than 40 years of combined logistics experience. Through established industry relationships, the platform helps businesses compare competitive freight rates for their specific shipment.
With the completed package, measurements, equipment details, and site requirements ready, Price this type of shipment.